


Yes, you can curl your hair using a flat iron — and it's easier than you think. With the proper technique and a rounded-edge straightener, you can create soft beach waves or glamorous Hollywood curls without switching tools. This step-by-step guide breaks down exactly how to do it, even if you've never curled your own hair before.
Whether you're going for loose waves or tighter curls, this tutorial walks you through both sides of your head using clear visual cues. You'll learn how to section your hair, wrap and glide the straightener, adjust your angle for different curl styles, and finish the look for long-lasting hold.
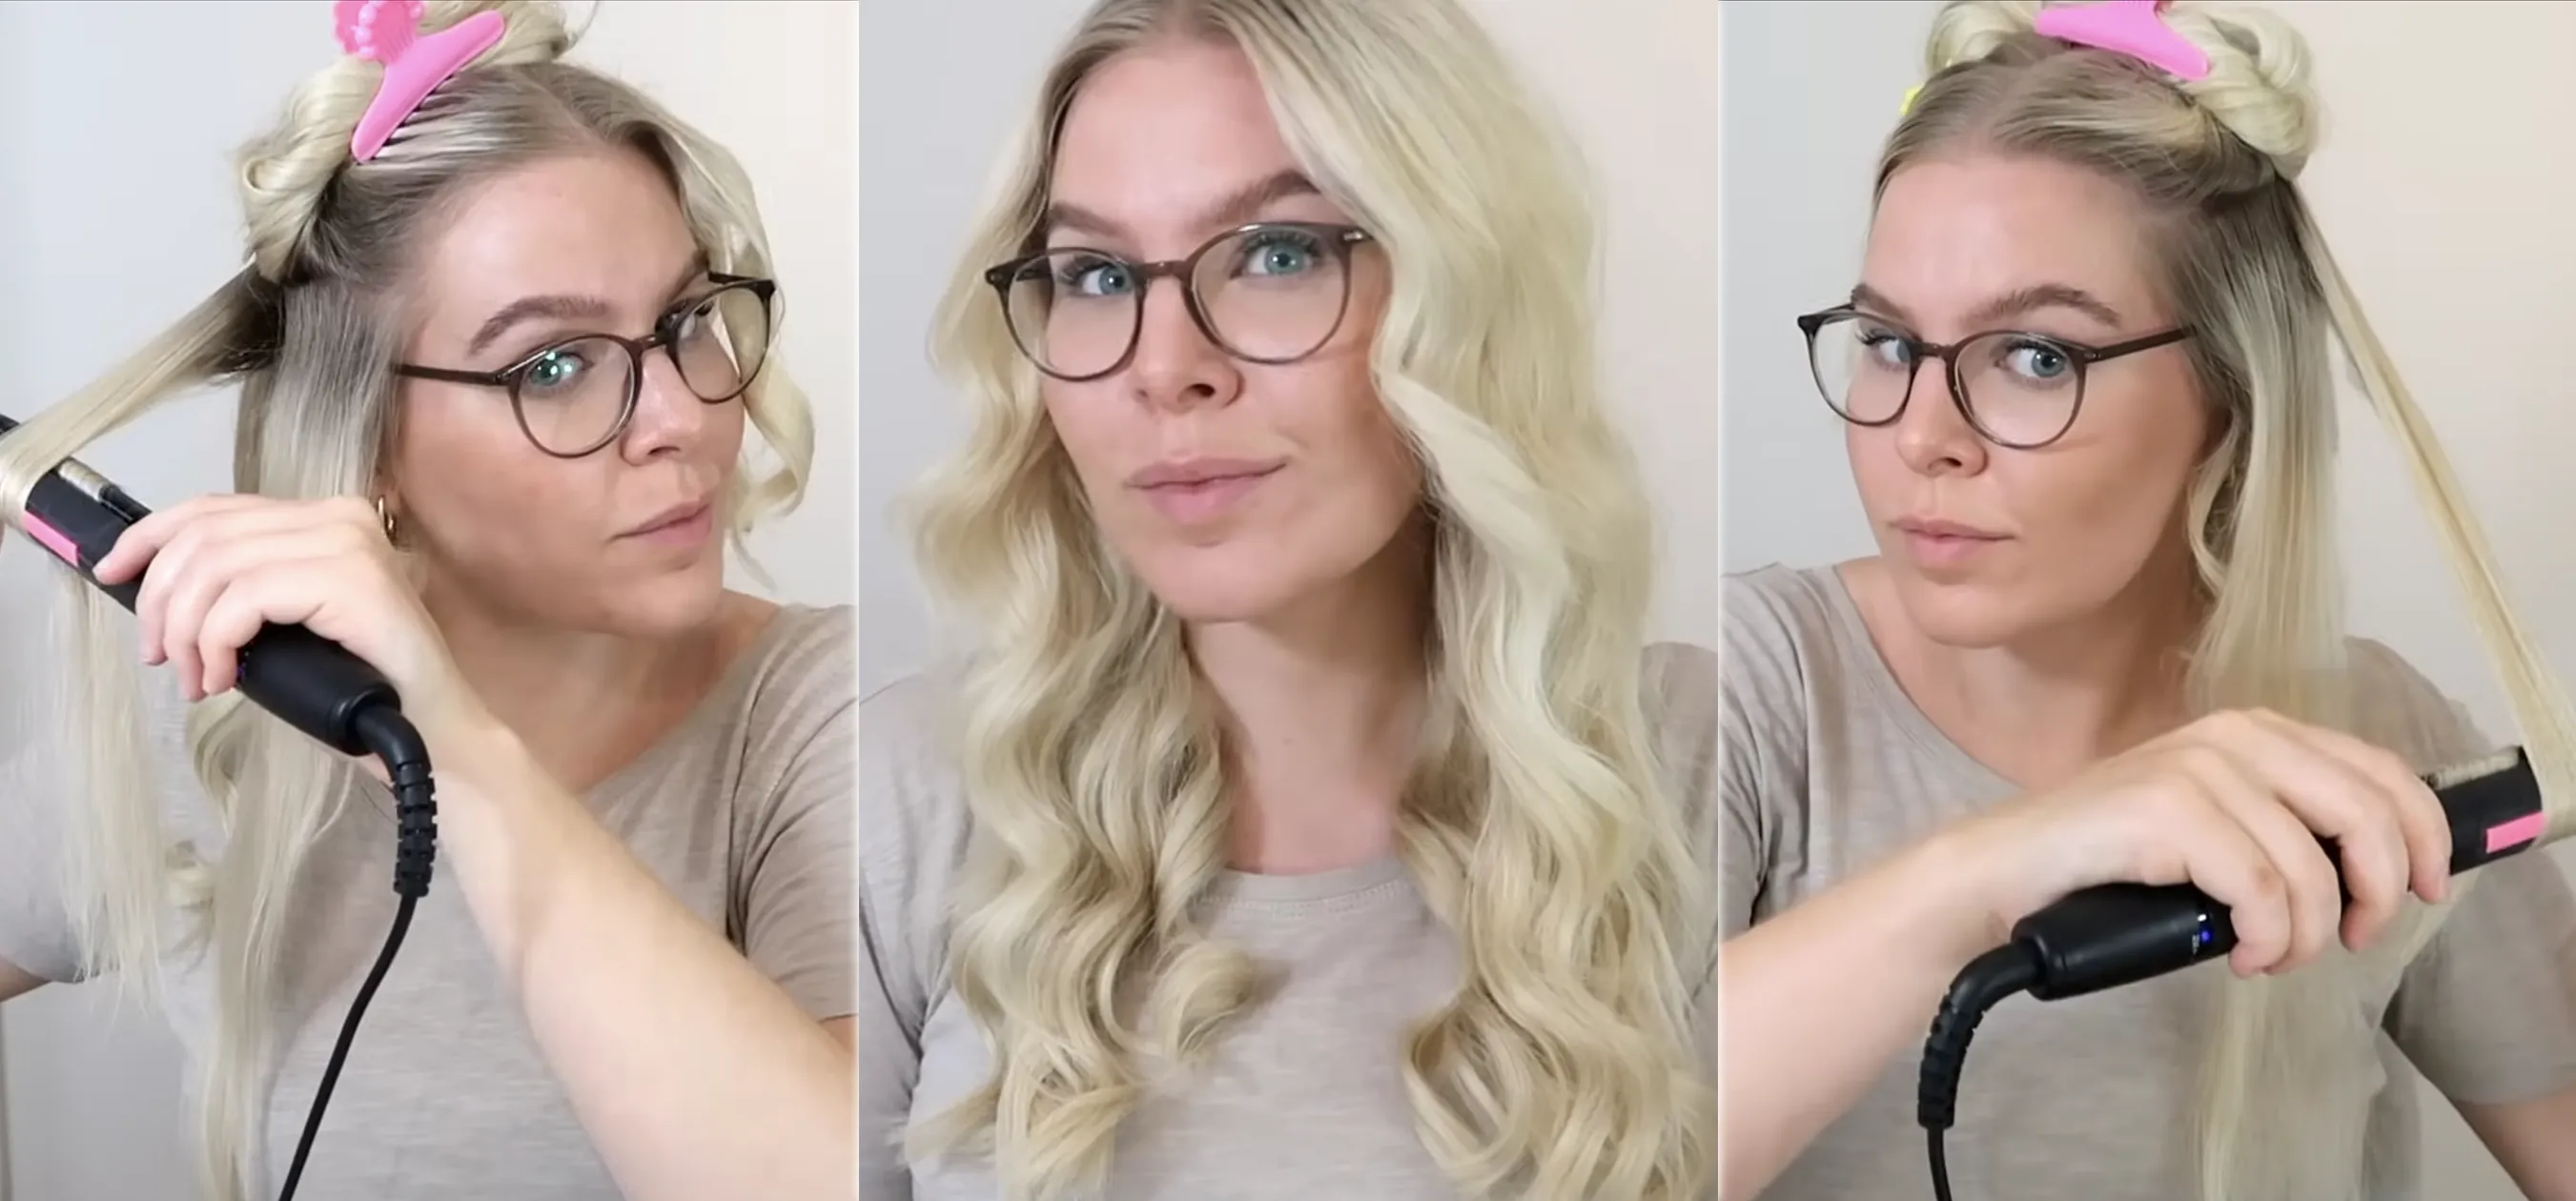
🎥 Watch the full video or skip to the instructions below to follow along with each step.
What you'll need
Before you start curling, make sure your hair is prepped and ready. This will help protect your strands and give you better results.
A straightener with rounded edges (any size will work, but thinner plates are easier to maneuver)
Hair clips or sectioning tools
Optional: hairspray for hold
Prep and section your hair
Start by spraying your hair with a heat protectant. This is essential to prevent damage from the hot plates. Brush your hair thoroughly to detangle and make it easier to work with.
Part your hair down the back and clip one side up to keep it out of the way. Then, section off the bottom layer behind your ear and clip the top layer up. You'll work from the bottom up, curling one section at a time.
Learn the curling technique (unplugged practice)
Practice the motion on a small section of hair with your straightener unplugged first. This helps you get used to the twist-and-pull motion without the risk of burning yourself.
Here's how the motion works:
Place a 1-inch section of hair between the straightener plates with the front of the straightener (the part facing away from you) pointed upward.
Twist the straightener a full turn downward while keeping a loose grip so the hair glides smoothly.
Pull the end of the hair forward across your face to help it wrap fully around the plates.
Slowly glide the straightener down the length of the hair while maintaining your twist.
Curl the right side (with heat)
Plug in your straightener and let it heat up. Start with the right side of your head:
Take a small section of hair.
Place it between the plates with the front side of the straightener facing up.
Twist the straightener one full turn downward.
Pull the end of the hair across the front of your face and glide the straightener down the length slowly.
The slower you go, the tighter the curl. If a curl turns out too tight, you can lightly run the straightener over it once to relax it.
Curl the left side
Move to the left side, repeating the same steps but using your opposite hand:
Section your hair behind your ear and clip up the top.
Place the straightener on a small section, twist once downward, and pull the end forward.
Slowly glide the straightener down to create the curl.
Once it's done, twist the curl gently with your fingers, and flip it back out of the way.
Loosen or set your curls
You can adjust the final look once you've curled your entire head. If your hair doesn't hold curl well, skip brushing and run your fingers through it to separate the curls slightly.
For longer-lasting volume:
Leave the curls to cool completely before touching them
Lightly brush through them for a softer, more natural look
Finish with hairspray to lock the style in place
Final result
Whether you're heading out for a casual day or a night out, curling your hair with a straightener gives you flexibility and style without needing extra tools. Once you've got the twisting motion down, you can adjust the angle, section size, and speed to create different looks.
Give it a try, and don't be afraid to practice with the straightener unplugged until it feels natural. You'll be curling like a pro in no time.


Comments
Be the first, drop a comment!